Beyond the Storm Living™️ is an Amazon Associate. I earn from qualifying purchases at no extra cost to you and may also earn from other affiliate links.

Wednesday, October 22, 2025

Vibrant Lily - Limited Palette of 3 Colors

October 22, 2025 0 Comments
vibrant lily watercolor painting limited palette three colors

Vibrant Lily - Painted with Only 3 Colors

This stunning lily was created using just three watercolor pigments, proving that a limited palette can produce incredibly vibrant and lively results. All the rich hues you see—from deep magenta to vivid greens—were mixed from a carefully selected primary triad, ensuring perfect color harmony and clean, mud-free mixes. The fine gold accents were preserved using masking fluid applied before painting.

Want to learn more about limited palette painting?
Read my complete guide here: [Coming Soon]

Credit for the inspiring technique and tutorial goes to the talented Debbie Friis-Pettitt. Try her tutorials—she is a true master of the limited palette!

Materials Used: #affiliatelinks

Paints:

M. Graham Nickel Azo Yellow

M. Graham Phthalo Blue

QOR Quinacridone Magenta

Paper:

Baohong Cold-Press

Brushes:

Use Debbie's recommended brushes (cheap & effective)

• OR check out my Princeton synthetic brushes guide to pick what works best for you

Masking:

Masking Fluid

#LimitedPalette #Watercolor #VibrantLily #ColorMixing #3ColorChallenge #WatercolorTutorial #ArtMaterials

Thursday, October 2, 2025

Painting a Pumpkin in Watercolor

October 02, 2025 0 Comments
There's something magical about the alla prima technique for capturing the warm, glowing colors of an autumn pumpkin
Capturing the glowing colors of a pumpkin with the spontaneous painting following the insightful tutorial from Nina Orlova (Drawing Dog Marathon). It was a wonderful exercise in laying down bold, wet-in-wet washes to capture the pumpkin's vibrant, glowing colors in a single session.Check out Alla Prima Technique for a spontenous painting.

Tuesday, September 30, 2025

Physalis branch

September 30, 2025 0 Comments
Physalis branch
Alla Prima technique-read more here. Totally obsessed with the fall vibes in Elena Vavilina's (Drawing Dog Marathon) tutorial! 🍂🎨 Trying out her cozy color palette and loose techniques was the perfect way to welcome the season. It’s amazing how a great tutorial can re-ignite your creative spark. What are you drawing now?

Friday, September 26, 2025

Chinese Painting for Stress Relief: Guaranteed Results in Under 15 Minutes

September 26, 2025 0 Comments
The Ancient Art That Melts Modern Stress: Chinese Brush Painting

Why Chinese Painting is the Ultimate Stress Relief You Never Knew You Needed

Are you drowning in stress and looking for something that actually works? I'm about to share something that genuinely transformed how I handle daily pressure, and I guarantee you'll feel the effects almost immediately.

Chinese painting isn't just art – it's meditation in motion.

The Magic Happens When You Stop Sketching

Here's what blew my mind: traditional Chinese painting requires no preliminary sketching. You pick up your brush, load it with ink, and paint directly onto the paper.

This sounds terrifying if you're used to Western techniques, but it's exactly why it works so powerfully for stress relief.

When you can't sketch first, you can't overthink. Your mind has no choice but to focus entirely on the present moment – the brush in your hand, the ink flowing onto paper, the simple stroke you're making right now.

The Immediate Effects Are Real (I Promise)

I know it sounds too good to be true, but I'm telling you – you will feel the stress-relieving effects within minutes. Here's what happens:

Within 5 minutes: Your breathing naturally slows down as you focus on brush control

Within 10 minutes: Racing thoughts quiet as you concentrate on stroke direction

Within 15 minutes: That tight feeling in your chest starts to dissolve

Within 30 minutes: You've entered a genuine meditative state

The effects aren't subtle. They're immediate and profound.

Start With Basic Strokes (No Experience Required)

You don't need to paint masterpieces. Chinese painting begins with fundamental brush strokes that are surprisingly therapeutic:

The Bamboo Stroke: Long, confident vertical lines that teach you to breathe and move with intention

Dot Strokes: Small, deliberate marks that require focused attention – perfect for quieting mental chatter

Flowing Lines: Curved strokes that follow the natural movement of your arm and wrist

Leaf Shapes: Simple forms that connect you to nature while building confidence

Each stroke demands your complete attention. There's no room for worry about work, relationships, or tomorrow's to-do list.

Why Chinese Painting Beats Other Stress Relief Methods

Unlike deep breathing exercises – you're not thinking about breathing; it happens naturally as you paint

Unlike meditation apps – you're creating something beautiful, not just sitting with your thoughts

Unlike journaling – you're expressing feelings through movement and color, not analyzing them

Unlike yoga – you can do this sitting down, with just a brush and some ink

The No-Sketch Rule Changes Everything

Western art teaches us to plan, sketch, and perfect. Chinese painting teaches the opposite: trust, flow, and accept.

When you can't erase or start over easily, you learn to:

  • Accept imperfections as part of beauty
  • Stay present instead of worrying about the outcome
  • Trust your instincts rather than overthinking every mark
  • Find peace in the process rather than stressing about results

This mindset shift doesn't stay on the paper – it flows into your daily life.

Getting Started Is Ridiculously Simple

You need literally four things:

✓ Rice paper (or even regular paper to start)

✓ Black ink or watercolor

✓ A soft brush

✓ A small dish for water

That's it. No expensive supplies, no special studio, no years of training required.

🏮 Want a More Authentic Experience?

You can try more traditional supplies that won't break your bank:

Rice Paper: Creates beautiful ink bleeding effects and feels wonderfully soft #afflink

Chinese Ink (Sumi ink): Rich, deep black that flows smoothly and mixes beautifully. The best feature-completely odorless!  #afflink

Larger Brushes: Perfect for bold, sweeping strokes and washes #afflink

Fine Detail Brushes: For delicate lines and precise dot work #afflink

These traditional materials enhance the meditative experience and connect you to centuries of artistic tradition!

Start tonight. Seriously. Get some black paint or ink, find any soft brush, and spend 15 minutes practicing simple vertical lines and dots.

The Science Behind Why This Works

Chinese painting activates the same brain states as meditation:

• Focused attention quiets the default mode network (where anxiety lives)

• Repetitive brush movements trigger the relaxation response

• Creating something beautiful releases feel-good endorphins

• The no-sketch approach forces mindfulness

Your nervous system literally can't stay in stress mode when you're fully absorbed in brush control and ink flow.

My Personal Experience

I started Chinese painting during one of the most stressful periods of my life. Within three sessions, I noticed something incredible: the tight knot of anxiety in my chest would dissolve within minutes of picking up the brush.

After a week of regular practice, I was sleeping better, reacting less to daily stressors, and finding moments of genuine calm throughout my day.

The effects are cumulative. The more you practice, the easier it becomes to access that peaceful state, even away from the painting table.

Try It Right Now

I challenge you to test this tonight. Get some black ink or paint, any brush you can find, and spend just 10 minutes making simple strokes on paper.

Don't aim for anything recognizable. Just focus on:

• How the brush feels in your hand

• The sound of bristles on paper

• The flow of ink as it spreads

• Your breathing as you move

I guarantee you'll feel different after those 10 minutes. Not "maybe a little calmer" different – genuinely, noticeably more peaceful.

The Bottom Line

Chinese painting isn't just an art technique – it's a direct path to inner calm. The no-sketch approach forces you into the present moment, and the simple brush strokes create an immediate meditative state.

In our hyperconnected, always-on world, we need practices that can quickly shift us out of stress mode. Chinese painting does exactly that, and it does it fast.

Give it a try tonight. Your stressed-out nervous system will thank you.


Have you tried Chinese painting for stress relief? I'd love to hear about your experience in the comments below.

Tuesday, September 23, 2025

Sumi-e Painting Guide: Master Japanese Ink Art for Beginners

September 23, 2025 0 Comments
Sumi-e painting of a few elegant bamboo stalks with delicate leaves, using minimalist ink wash techniques on rice paper.

How to Start Sumi-e Ink Painting: Beginner's Journey with Rice Paper & Brushes

Learn Sumi-e Japanese ink painting with this beginner's guide. Master zen brush techniques, rice paper tips & essential supplies for stress relief.

What is Sumi-e Painting? Understanding Japanese Ink Art

Sumi-e, the ancient Japanese art of ink wash painting, is more than just a technique—it's a meditative practice rooted in Zen philosophy. Originating from Chinese Chan Buddhist monks around the 13th century, it was brought to Japan where it flourished. The goal of Sumi-e is not to create a photorealistic copy, but to capture the essential spirit or "ki" of a subject with a few, powerful strokes. It's the art of suggestion, where the empty space (or "ma") is as important as the ink itself.

"The beauty of sumi-e lies not in what is painted, but in what is left unpainted"

The Four Treasures: Essential Sumi-e Painting Tools

To practice Sumi-e, one must become acquainted with the "Four Treasures":

1. Ink (Sumi): The Soul of Japanese Ink Art

Traditional ink is made from a compressed stick of pine soot and animal glue. The artist grinds this stick on an inkstone with water, a calming ritual that prepares the mind for painting. For those eager to start without this step, convenient pre-made liquid inks are a great alternative. While my proper odorless sumi ink #afflink is still in the mail, I've been practicing with PH. Martin's Liquid Black Watercolor, which offers a rich, intense black. My ink finally came! it is wonderful! 

Pro Tip: Ready-to-use liquid inks offer instant convenience for beginners - no grinding, no waiting, just pour and paint! Perfect for those eager to start their sumi-e journey immediately while building fundamental skills.

2. Brushes (Fude): Tools for Zen Brushwork

Sumi-e brushes are essential for creating the fluid strokes of the art. A good beginner option is this versatile, soft wolf hair brush #afflink with a lightweight aluminum handle, which is comfortable for long practice sessions. For artists who want to explore a full range of marks, this comprehensive Calligraphy Brush Set #afflink with multiple sizes is ideal. From my own experience, the smallest brushes in a set like this often become the most loved—they are incredibly precise and great for fine details.

3. Paper (Kami): The Canvas for Watercolor Zen

This is a critical element. True Sumi-e is done on rice paper (Xuan paper), and the type dramatically changes the result:

Raw (Sheng Xuan): Highly absorbent and unforgiving. It allows for beautiful ink diffusion, but a stroke cannot be changed. I was lucky to find some locally, and you can see in my beginner attempts how the paper puckers as it reacts to the moisture—it's all part of the process!

Half-sized (Ban Xuan): Treated to reduce absorption, offering more control for learners. This is the best of both worlds - you get some of the beautiful ink effects while having more control over your strokes. I recommend Half-sized paper for most needs.

Sized Paper (Shuen Xuan): This non-absorbent paper is used for the detailed, precise style of painting, where ink must stay exactly where it is placed.

For practice, I also used regular drawing paper, which doesn't have the same beautiful bloom but is excellent for building confidence with brush strokes.

For starters, any paper can be used to begin your Sumi-e journey, but keep in mind that strokes will look different and won't be as effortless as on traditional rice paper.

4. Inkstone (Suzuri): The Meditation Tool

The stone slab used for grinding the inkstick and mixing the ink to the perfect consistency.

My Beginner's Journey: First Bamboo Painting Attempts

The images here are from my first attempts at painting bamboo, the first subject many students learn. Some are on practice paper, while others are on the "raw" rice paper I found. You can see the difference the paper makes! The way the ink spreads on the raw paper is both a challenge and a beautiful surprise. I can't wait to continue this journey with these beautiful, zen paintings.

Traditional Japanese Sumi-e artwork, but made on the mixed media paper

My first bamboo painting attempt on a regular mixed media paper

Want to see more of my sumi-e learning journey? Check out my sumi-e practice gallery with detailed photos of my progress, different techniques, and paper comparisons.

My Humble Sumi-e Setup

Sumi-e supplies-everything I had handy to start right away

My humble supplies: PH Martin's liquid ink, various brushes, and holders for sumi-e practice

The Balance of Mind and Brush

The true beauty of Sumi-e lies in its therapeutic nature. The focus required to execute a single, confident stroke forces the mind into the present moment. There is no room for hesitation; the paper accepts the ink immediately. This teaches the artist to accept imperfections and find harmony in the process itself. It is a wonderful release from stress and a path to inner balance. I am just beginning, but I already feel the calming focus it brings.

Personal Experience: Even as a beginner, I immediately felt the calming focus that this traditional practice provides. Each brushstroke becomes a moment of meditation, transforming simple ink into profound peace.

Common Problems and Solutions for Sumi-e Beginners

Problem: Ink Bleeding and Feathering

Solution: Start with less absorbent paper and gradually work up to raw rice paper. Control ink consistency by mixing with small amounts of water. Practice brush loading techniques to avoid oversaturation.

Problem: Hesitant, Shaky Brushstrokes

Solution: Develop confidence through repetitive practice of basic strokes. Focus on breathing rhythm and commit fully to each mark. Remember, zen philosophy teaches that imperfection has its own beauty.

Problem: Lack of Tonal Variation

Solution: Master the "five tones of ink" by practicing ink dilution ratios. Learn to load your brush with multiple ink concentrations for gradated strokes within single movements.

Frequently Asked Questions About Sumi-e Painting

What makes sumi-e different from regular watercolor painting?
Sumi-e painting emphasizes capturing essence over detail, uses monochromatic ink, and integrates zen meditation principles. Unlike Western watercolor, it values empty space and spontaneous, confident brushwork over careful planning and color mixing.

How long does it take to learn basic sumi-e techniques?
Basic brush control and simple subjects like bamboo can be learned in a few weeks of daily practice. However, mastering the zen philosophy and advanced ink wash techniques is a lifelong journey that deepens with continued practice and meditation.

Can I practice sumi-e without expensive traditional supplies?
Absolutely! Start with liquid black watercolor, basic watercolor brushes, and drawing paper. While traditional rice paper and ink sticks enhance the authentic experience, learning fundamental techniques is possible with accessible supplies.

What subjects are best for beginning sumi-e artists?
Bamboo painting is the classic starting point, teaching essential brush pressure and rhythm. Other beginner-friendly subjects include simple flowers, birds, and landscapes that emphasize basic forms and negative space principles.

Is sumi-e really meditative, or is that just marketing?
The meditative aspects are genuine and rooted in centuries of zen practice. The requirement for present-moment awareness, breath control, and acceptance of impermanence creates natural meditation. Many practitioners report significant stress reduction and improved mindfulness.

How do I know if I'm progressing in sumi-e painting?
Progress in sumi-e isn't just technical improvement - it's also developing inner calm, confidence in brushstrokes, and the ability to suggest rather than describe. Look for increased spontaneity, better ink control, and growing comfort with empty space in compositions.

Advanced Sumi-e Techniques: Beyond Bamboo

Once comfortable with basic bamboo brushwork, you can move to explore subjects like:

  • Mountain landscapes - Teaching atmospheric perspective and ink wash gradations
  • Bird paintings - Developing precision and capturing movement
  • Flower studies - Balancing delicate details with bold simplification
  • Calligraphy integration - Combining poetry with painted imagery

Building Your Sumi-e Practice: Tips for Success

Daily Practice Routine for Zen Art Mastery

  • Morning preparation: 5 minutes of mindful ink grinding or preparation
  • Warm-up strokes: Practice basic lines, dots, and pressure variations
  • Subject focus: 15-20 minutes on chosen subject (start with bamboo)
  • Reflection time: Observe results without judgment, noting areas for growth

Where to Buy Authentic Sumi-e Supplies

Quality sumi-e art materials significantly impact your learning experience. Look for:

Pro Tip: Elevate your Sumi-e art with Chinese mineral watercolor paints, specially formulated for rice paper. Their unique composition delivers vibrant, flowing color that moves with the absorbent surface, staying true to the spirit of this ancient practice while offering brilliant pigmentation.

"In sumi-e, we paint not what we see, but what we feel - the invisible essence made visible through ink and intention"

Conclusion: Embracing the Way of Ink

Sumi-e painting offers more than artistic skill development - it provides a pathway to mindfulness, stress relief, and creative fulfillment. Whether you're drawn to the meditative aspects, the elegant simplicity of Japanese aesthetics, or the challenge of mastering traditional brush techniques, this ancient art form has profound gifts for modern practitioners.

Start your journey today with basic supplies and an open mind. Remember, in sumi-e philosophy, there are no mistakes - only opportunities to practice acceptance and find beauty in the unexpected. Each brushstroke is a step toward both artistic mastery and inner peace.

Ready to begin your sumi-e meditation journey? Gather your supplies, prepare your mind, and let the ancient wisdom of ink and brush guide you toward artistic and spiritual discovery.

The Beauty of the Imperfect Line: First Steps in Sumi-e

September 23, 2025 0 Comments
Sumi-e artwork- bamboo
Sumi-e artwork
Sumi-e practice
Sumi-e practice
Sumi-e practice
Sumi-e practice
Sumi-e artwork
Sumi-e artwork
Sumi-e artwork
Sumi-e artwork

"There's something so Zen-yet-fun about Sumi-e painting—where every stroke teaches patience and presence." 🖋️✨

I've been inspired by the graceful techniques of masters like Alexandra Vasylieva (Drawing Dog Marathon) and Kate Wu, whose tutorials and artworks guided my first Sumi-e attempts.

Still learning, but loving every mindful moment with ink and brush. 🎋

Curious to learn more about the art of Sumi-e?

I've shared deeper insights and resources on my blog—

🌿 Click here to explore further! 🌿

Where do you find your creative calm? 🧘‍♀️💚

#SumiE #InkPainting #ZenArt #MindfulCreating #LearnFromTheMasters #BambooArt #JapaneseArt #InkWash #ArtBlog
🌿 ∼ 🖋️ ∼ 🎋 ∼ 🖋️ ∼ 🌿

Wednesday, September 10, 2025

Watercolor Tulip Study: Alla Prima Technique with Limited Palette

September 10, 2025 0 Comments
Botanical art-tulip in alla prima technique and limited palette

Watercolor tulip study created using the alla prima technique with a carefully chosen limited palette. This direct painting approach captures the natural vibrancy and spontaneous beauty of tulips, while the restricted color selection creates visual unity and enhances the overall composition.

This study was created following guidance from Elena Vavilina's excellent tutorial (Drawing Dog Marathon) 🌷 Full credit to her for the inspiration and instruction.

👉 Discover the alla prima watercolor technique in my comprehensive guide

Tuesday, September 9, 2025

Wednesday, August 20, 2025

Alla prima technique: Bold and Spontaneous Art

August 20, 2025 0 Comments

alla prima watercolor painting technique

Watercolor Alla Prima Tutorial: Master One-Session Wet-into-Wet Painting Technique

You've probably been taught that watercolor requires multiple layers and careful planning. But what if you could create stunning, vibrant watercolor paintings in just one session? Watercolor alla prima technique breaks traditional rules by completing entire paintings while the paint stays wet, creating natural color blending and atmospheric effects impossible with layered approaches.

What You'll Learn in This Watercolor Alla Prima Tutorial:

  • What is Watercolor Alla Prima Technique?
  • Common Problems and Solutions
  • Step-by-Step Alla Prima Method
  • Real Painting Examples
  • Best Materials for Alla Prima Watercolor
  • Frequently Asked Questions
Quick Summary: Watercolor alla prima (Italian for "at once") is a direct painting technique where you complete your watercolor artwork in one continuous session using wet-into-wet methods. This creates spontaneous color mixing, soft atmospheric effects, and captures the immediacy of your subject with fresh, vibrant results.
Tutorial Inspiration: Thank you to Ilia Ibryaev for the excellent watercolor alla prima tutorials that inspired this comprehensive guide. The paintings pictured in this guide are from his tutorials.

What is Watercolor Alla Prima Technique?

The Problem with Traditional Watercolor Methods:

Most watercolor tutorials teach you to work in careful layers, waiting for each section to dry. This often results in:

  • Muddy colors from overworking
  • Lost spontaneity and freshness
  • Stiff, overcontrolled paintings
  • Missing the fleeting effects of natural light

The Alla Prima Solution:

Single-session watercolor painting preserves the natural flow and luminosity of watercolor while creating effects that are impossible with traditional layering:

  • Natural atmospheric perspective through wet-into-wet blending
  • Preserved color intensity and transparency
  • Spontaneous, lively brushwork
  • Perfect for capturing changing light conditions

Example 1: Atmospheric Fog Landscape Alla Prima

watercolor alla prima fog landscape painting tutorial

Watercolor alla prima fog landscape showing natural atmospheric effects achieved through single-session wet-into-wet painting technique

Notice how the wet-into-wet watercolor technique creates natural fog effects that would be nearly impossible to achieve with traditional layering methods. The colors blend seamlessly, creating authentic atmospheric depth.
Credit: Ilia Ibryaev (Drawing Dog Marathon)

Complete Step-by-Step Watercolor Alla Prima Method

Phase 1: Planning Your Single-Session Watercolor

1. Choose Simple Subjects for Alla Prima Success

  • Landscapes with atmospheric effects (fog, mist, soft light)
  • Sky studies with cloud formations
  • Simple still life arrangements with unified lighting
  • Plein air subjects with changing light conditions

2. Set Up Your Watercolor Alla Prima Workspace

  • Arrange all materials within easy reach
  • Pre-wet your brushes and test paint consistency
  • Have clean water and paper towels ready
  • Position your reference (if using one) for easy viewing

Phase 2: The Alla Prima Painting Process

3. Start with Light Value Washes

Begin with your lightest tones using very diluted paint. In direct watercolor painting, you must establish your light values first since you cannot go back to lighten areas.

4. Work Wet-into-Wet for Natural Blending

While your initial washes are still damp, introduce adjacent colors. This is where the magic of watercolor alla prima technique happens - colors blend naturally on the paper.

🎨 Master Advanced Watercolor Blending:
Complete Watercolor Blending Techniques Guide →
Learn 5 professional blending methods

5. Build Gradually to Dark Values

Add progressively darker tones while maintaining wet edges where you want soft transitions. The key to successful one-session watercolor painting is working confidently without overworking.

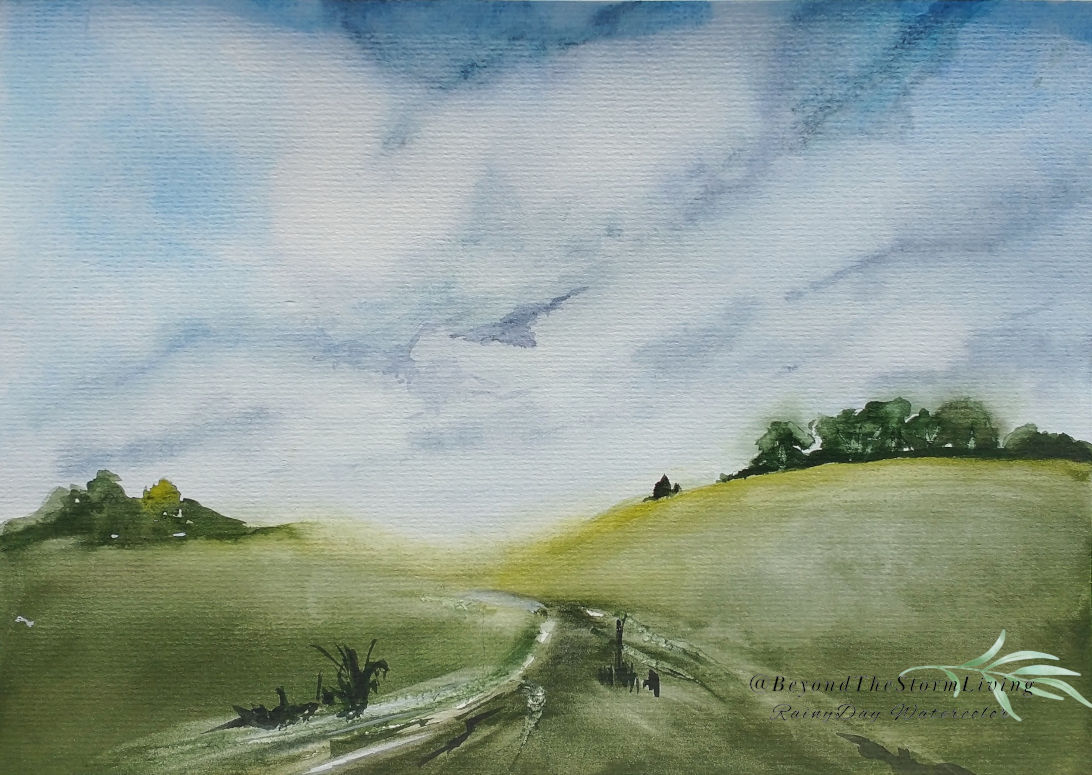
Example 2: Landscape Alla Prima Demonstration

watercolor alla prima sky landscape painting tutorial

Watercolor alla prima landscape demonstrating seamless cloud formations and color transitions using single-session painting methods

This plein air watercolor alla prima example shows how working in one session captures the natural flow of sky colors and cloud formations. The wet-into-wet blending creates realistic atmospheric perspective.
Credit: Ilia Ibryaev (Drawing Dog Marathon)

Essential Materials for Watercolor Alla Prima Success

Recommended Watercolor Alla Prima Setup:

  • Paper: Cold-pressed watercolor paper (140lb minimum) - holds water well for extended working time
  • Brushes: Round watercolor brushes (sizes 8, 12, 16) - avoid stiff brushes that fight the natural flow
  • Paints: Professional watercolor pigments with good transparency
  • Palette: Large mixing area for color combinations
  • Water containers: Two jars - one for cleaning, one for clean water
💡 Get My Complete Watercolor Supply Recommendations:
Complete Watercolor Supplies →
#affiliatelinks

Ideal Color Palette for Alla Prima Watercolor:

  • Ultramarine Blue (mixing essential for atmospheric effects)
  • Raw Sienna (perfect for warm earth tones)
  • Quinacridone Rose (transparent mixing color)
  • New Gamboge (clean yellow for color mixing)
  • Burnt Umber (for dark values and shadows)

Common Watercolor Alla Prima Problems and Expert Solutions

Problem: Paint Dries Too Quickly

Solution: Work on properly sized paper, use more water in your initial washes, and paint in sections rather than trying to cover the entire surface at once.

Problem: Colors Become Muddy

Solution: Limit your palette to 4-5 colors maximum. Muddy colors in watercolor alla prima painting usually result from mixing too many pigments or overworking areas.

Problem: Lost Control of Water Flow

Solution: Practice controlling paint consistency. For wet-into-wet watercolor technique, use paint that's creamy but not too thick, and learn to read paper dampness levels.

Problem: Painting Lacks Structure

Solution: Plan your light and dark value patterns before starting. Single-session watercolor painting requires more upfront planning than traditional methods.

Frequently Asked Questions About Watercolor Alla Prima

Q: How long should a watercolor alla prima session last?

A: Most successful watercolor alla prima paintings are completed in 30-90 minutes, depending on size and complexity. The key is working while the paint remains workable.

Q: Can beginners learn watercolor alla prima technique?

A: Yes! Watercolor alla prima for beginners actually teaches essential skills like color mixing, value control, and confident brushwork. Start with simple subjects like single flowers or basic landscapes.

Q: What's the difference between alla prima and wet-on-wet?

A: Wet-into-wet watercolor technique is a method of paint application, while alla prima refers to completing the entire painting in one session. Alla prima often uses wet-into-wet methods but encompasses the complete painting approach.

Q: Is watercolor alla prima suitable for detailed paintings?

A: Direct watercolor painting works best for subjects emphasizing atmosphere, mood, and overall impression rather than fine details. For highly detailed work, traditional layering methods are more appropriate.

Q: How do I prevent watercolor alla prima paintings from looking unfinished?

A: Focus on strong value contrasts and ensure you have definite light, medium, and dark areas. One-session watercolor painting should have clear focal points and well-defined shapes despite soft edges.

Advanced Watercolor Alla Prima Techniques

Mastering Atmospheric Perspective in Alla Prima

Use the natural properties of wet-into-wet watercolor technique to create depth:

  • Distant elements: Very wet, pale, soft-edged
  • Middle ground: Medium wetness, moderate values
  • Foreground: Controlled dampness, strong values, defined edges

Color Temperature Control

In immediate watercolor painting technique, use warm and cool color relationships to create spatial depth and visual interest without relying on fine details.

Take Your Watercolor Alla Prima Skills Further

Next Steps for Mastering Single-Session Watercolor:

  • Practice plein air watercolor alla prima to develop speed and confidence
  • Experiment with different subjects - from watercolor alla prima landscapes to simple portraits
  • Study master painters who used direct painting techniques
  • Join online communities focused on direct watercolor painting methods
  • Document your progress with before/after photos

The beauty of watercolor alla prima technique lies in its honesty - what you see is what you get. There's no going back to "fix" things, which forces you to paint with intention and embrace the natural flow of watercolor. This single-session watercolor painting approach will transform how you think about watercolor and help you create more spontaneous, lively artwork.

Related Watercolor Techniques: watercolor alla prima tutorial, single session watercolor painting, wet into wet watercolor technique, direct watercolor painting method, watercolor alla prima for beginners, one session watercolor tutorial, plein air watercolor alla prima, immediate watercolor painting technique, watercolor wet on wet tutorial, alla prima watercolor landscape, direct watercolor painting methods, single session watercolor techniques, watercolor alla prima tips, wet into wet watercolor painting, watercolor alla prima step by step

Thursday, August 14, 2025

Easy Beginner Landscape Watercolor

August 14, 2025 0 Comments

Easy Beginner Landscape Watercolor Tutorial
Sweeping Colorful Skies & Simple Silhouettes 🌅

This beginner landscape painting is all about letting the sky steal the show! With just a few colors and simple wet-on-wet blending, you'll create stunning sweeping skies while keeping the land beautifully simple with dark silhouettes. Perfect for your first landscape adventure!

🎨 What You'll Need

Essential Materials:

  • Watercolor paints: Warm colors (yellows, oranges, pinks) + cool colors (blues, purples)
  • Dark color for silhouettes: Payne's Gray, Burnt Umber, or mix your own dark
  • Watercolor paper: 140lb minimum, cold-pressed recommended

Brushes You'll Need:

  • Large wash brush (size 12-16) for sweeping skies
  • Medium round brush (size 6-8) for land details
  • Small detail brush (size 2-4) for trees and plants

Learn more about choosing the right brushes in my watercolor brushes guide.

🌈 Key Techniques

1. Sweeping Sky Blending

Work on wet paper with horizontal brush strokes, blending warm and cool colors for dramatic sky effects. The key is working quickly while the paper stays wet!

2. Simple Silhouette Technique

Once your sky is completely dry, paint simple dark shapes for land, trees, and plants. No details needed - just bold, confident silhouettes! Master these blending techniques for seamless color transitions.

Step-by-Step Landscape Painting

1.

Wet your paper -partially or completely.

2.

Start with warm colors near the horizon line - yellows and oranges. Work with horizontal sweeping motions.

3.

Blend upward with cool/blue colors - add pinks, then blues as you move toward the top of your sky.

4.

Let everything dry completely - this is crucial! Any dampness will cause your silhouettes to bleed.

5.

Paint your silhouettes with confident, simple shapes. Think rolling hills, tree clusters, and plant forms - no details needed!

💡 Pro Tips for Stunning Skies

  • Work fast on wet paper - you have about 5-10 minutes before it starts to dry
  • Use horizontal brush strokes - they mimic natural cloud formations
  • Don't overthink the silhouettes - simple shapes are more powerful than detailed ones
  • Leave some white paper in your sky for natural highlights and clouds
  • Tilt your paper slightly to help colors flow and blend naturally

🎯 Color Combinations That Work

Sunset vibes: Yellow → Orange → Pink → Purple → Deep Blue

Sunrise vibes: Pale Yellow → Peach → Rose → Soft Blue

Storm approaching: Gray-Blue → Purple → Warm Gray → Yellow highlight

Master these color blending techniques for even smoother transitions!

🌿 Simple Silhouette Ideas

  • Rolling hills - just gentle curved lines
  • Tree clusters - think cotton ball shapes on sticks
  • Tall grasses - quick vertical brush strokes
  • Distant mountains - simple triangular shapes
  • Fence posts - thin vertical lines for interest

Followed live Kolbie Blume’s demonstration/tutorial from The Pigeon Letters' free Summer Creative Retreat—such an inspiring technique to learn!

Question: What's your favorite time of day to paint in watercolor skies?

🎨 #BeginnerLandscape #WatercolorSkies #SkyBlending #LandscapePainting #BeginnerWatercolor #WatercolorTutorial #SimpleLandscape

Wednesday, August 13, 2025

Easy Neon Cat Sign in Watercolor

August 13, 2025 0 Comments
neon cat watercolor painting tutorial masking fluid gradient blending beginner guide glowing effects

Easy Neon Cat Sign in Watercolor- Step by Step
Masking Fluid & Gradient Blending Magic ✨

This playful neon cat painting is simpler than it looks! With just masking fluid, two-three brushes, and controlled wet-on-wet blending, you can create glowing effects. Perfect for beginners craving bold results.

🎨 What You'll Need

Essential Materials:

  • Masking fluid for crisp neon outlines - check my recommended supplies. Posca pen can also be used!
  • High-pigment colors (e.g., Phthalo Blue, Opera Pink for neon vibes)

Brushes You'll Need:

  • Liner brush for fine details like whiskers
  • Large wash brush (mop or alternative) for backgrounds
  • Size 4-6 brush for lifting techniques

⚡ Key Techniques

1. Lifting Paint for Glow Effects

Dab wet areas with a dry brush or paper towel to create "glow" halos around your neon signs. This lifting technique is what makes the neon effect pop!

2. Gradient Blending

Work fast! Load your brush and blend for neon fade effects - darker on the outside. Master these blending and lifting techniques for professional results.

Step-by-Step Neon Sign Painting

1.

Sketch your cat silhouette and apply masking fluid to the neon tubes. Let it dry completely before moving on.

2.

Wet the entire background and drop in darker color on the outside using wet-on-wet technique.

3.

Lift paint right on the outline using your size 4-6 brush or paper towel while the paint is still wet.

4.

Use your liner brush to create lines with a darker color parallel to the masking fluid line for added definition.

5.

Let dry completely, then carefully remove the masking fluid to reveal your crisp neon lines.

💡 Pro Tips for Neon Effects

  • High-contrast is key - Use your darkest darks against bright neon colors
  • Work in sections - Complete one neon sign at a time while paint is manageable if it is a large sign
  • Less is more with masking fluid - thin, clean lines work best
  • Practice lifting on scrap paper first to get the glow effect right

Learn more about choosing the right brushes in my watercolor brushes guide.

Followed Mako (Makoccino)'s lovely tutorial from The Pigeon Letters' free Summer Creative Retreat—such an inspiring technique to learn!

Question: What's your favorite subject for neon-style watercolor paintings?

🎨 #NeonWatercolor #MaskingFluid #GradientBlending #WatercolorCat #BeginnerWatercolor #WatercolorTutorial #NeonArt

Friday, August 8, 2025

Loose Watercolor Flower Heart (No Sketching, Just Wet-on-Wet Magic!) 🌸💖

August 08, 2025 0 Comments
wet on wet watercolor flower heart sketch free painting tutorial beginner friendly loose style

Painted this soft, flowing flower heart with no sketching—just pure play! Loved how the bright blooms faded into dreamy edges. A perfect beginner-friendly piece for anyone scared of 'perfect' lines.

The heart is painted using wet-on-wet technique, while the flowers combine both wet-on-wet and wet-on-dry techniques for beautiful texture variety.

Followed Clarice Gomes's lovely tutorial from The Pigeon Letters' free Summer Creative Retreat—such a liberating way to paint!

🎨 What You'll Need

Any colors you love will work beautifully for this piece! Depending on the size of your heart, you might need:

  • Brushes: Size 8-10 for the heart, plus size 2-4 for flower details
  • Paper: 100% cotton watercolor paper (140lb recommended)
  • Colors: Whatever makes your heart sing!

You can look through my recommended supplies to see what I use and love.

Question: Do you prefer sketch-free watercolor or guided outlines?

🎨 #LooseWatercolor #WetOnWet #NoSketchArt #BeginnerWatercolor #FlowerHeart #FreeArtTutorial