
Watercolor Alla Prima Tutorial: Master One-Session Wet-into-Wet Painting Technique
You've probably been taught that watercolor requires multiple layers and careful planning. But what if you could create stunning, vibrant watercolor paintings in just one session? Watercolor alla prima technique breaks traditional rules by completing entire paintings while the paint stays wet, creating natural color blending and atmospheric effects impossible with layered approaches.
What You'll Learn in This Watercolor Alla Prima Tutorial:
- What is Watercolor Alla Prima Technique?
- Common Problems and Solutions
- Step-by-Step Alla Prima Method
- Real Painting Examples
- Best Materials for Alla Prima Watercolor
- Frequently Asked Questions
What is Watercolor Alla Prima Technique?
The Problem with Traditional Watercolor Methods:
Most watercolor tutorials teach you to work in careful layers, waiting for each section to dry. This often results in:
- Muddy colors from overworking
- Lost spontaneity and freshness
- Stiff, overcontrolled paintings
- Missing the fleeting effects of natural light
The Alla Prima Solution:
Single-session watercolor painting preserves the natural flow and luminosity of watercolor while creating effects that are impossible with traditional layering:
- Natural atmospheric perspective through wet-into-wet blending
- Preserved color intensity and transparency
- Spontaneous, lively brushwork
- Perfect for capturing changing light conditions
Example 1: Atmospheric Fog Landscape Alla Prima

Watercolor alla prima fog landscape showing natural atmospheric effects achieved through single-session wet-into-wet painting technique
Notice how the wet-into-wet watercolor technique creates natural fog effects that would be nearly impossible to achieve with traditional layering methods. The colors blend seamlessly, creating authentic atmospheric depth.
Credit: Ilia Ibryaev (Drawing Dog Marathon)
Complete Step-by-Step Watercolor Alla Prima Method
Phase 1: Planning Your Single-Session Watercolor
1. Choose Simple Subjects for Alla Prima Success
- Landscapes with atmospheric effects (fog, mist, soft light)
- Sky studies with cloud formations
- Simple still life arrangements with unified lighting
- Plein air subjects with changing light conditions
2. Set Up Your Watercolor Alla Prima Workspace
- Arrange all materials within easy reach
- Pre-wet your brushes and test paint consistency
- Have clean water and paper towels ready
- Position your reference (if using one) for easy viewing
Phase 2: The Alla Prima Painting Process
3. Start with Light Value Washes
Begin with your lightest tones using very diluted paint. In direct watercolor painting, you must establish your light values first since you cannot go back to lighten areas.
4. Work Wet-into-Wet for Natural Blending
While your initial washes are still damp, introduce adjacent colors. This is where the magic of watercolor alla prima technique happens - colors blend naturally on the paper.
Complete Watercolor Blending Techniques Guide →
Learn 5 professional blending methods
5. Build Gradually to Dark Values
Add progressively darker tones while maintaining wet edges where you want soft transitions. The key to successful one-session watercolor painting is working confidently without overworking.
Example 2: Landscape Alla Prima Demonstration
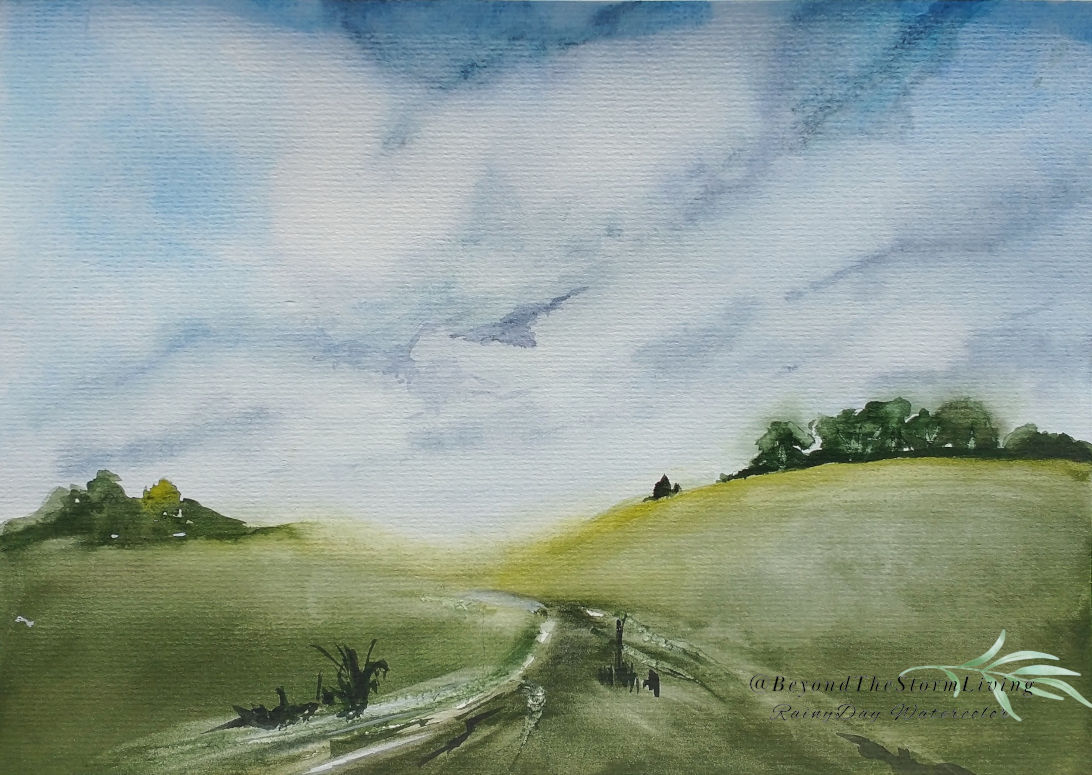
Watercolor alla prima landscape demonstrating seamless cloud formations and color transitions using single-session painting methods
This plein air watercolor alla prima example shows how working in one session captures the natural flow of sky colors and cloud formations. The wet-into-wet blending creates realistic atmospheric perspective.
Credit: Ilia Ibryaev (Drawing Dog Marathon)
Essential Materials for Watercolor Alla Prima Success
Recommended Watercolor Alla Prima Setup:
- Paper: Cold-pressed watercolor paper (140lb minimum) - holds water well for extended working time
- Brushes: Round watercolor brushes (sizes 8, 12, 16) - avoid stiff brushes that fight the natural flow
- Paints: Professional watercolor pigments with good transparency
- Palette: Large mixing area for color combinations
- Water containers: Two jars - one for cleaning, one for clean water
Ideal Color Palette for Alla Prima Watercolor:
- Ultramarine Blue (mixing essential for atmospheric effects)
- Raw Sienna (perfect for warm earth tones)
- Quinacridone Rose (transparent mixing color)
- New Gamboge (clean yellow for color mixing)
- Burnt Umber (for dark values and shadows)
Common Watercolor Alla Prima Problems and Expert Solutions
Problem: Paint Dries Too Quickly
Solution: Work on properly sized paper, use more water in your initial washes, and paint in sections rather than trying to cover the entire surface at once.
Problem: Colors Become Muddy
Solution: Limit your palette to 4-5 colors maximum. Muddy colors in watercolor alla prima painting usually result from mixing too many pigments or overworking areas.
Problem: Lost Control of Water Flow
Solution: Practice controlling paint consistency. For wet-into-wet watercolor technique, use paint that's creamy but not too thick, and learn to read paper dampness levels.
Problem: Painting Lacks Structure
Solution: Plan your light and dark value patterns before starting. Single-session watercolor painting requires more upfront planning than traditional methods.
Frequently Asked Questions About Watercolor Alla Prima
Q: How long should a watercolor alla prima session last?
A: Most successful watercolor alla prima paintings are completed in 30-90 minutes, depending on size and complexity. The key is working while the paint remains workable.
Q: Can beginners learn watercolor alla prima technique?
A: Yes! Watercolor alla prima for beginners actually teaches essential skills like color mixing, value control, and confident brushwork. Start with simple subjects like single flowers or basic landscapes.
Q: What's the difference between alla prima and wet-on-wet?
A: Wet-into-wet watercolor technique is a method of paint application, while alla prima refers to completing the entire painting in one session. Alla prima often uses wet-into-wet methods but encompasses the complete painting approach.
Q: Is watercolor alla prima suitable for detailed paintings?
A: Direct watercolor painting works best for subjects emphasizing atmosphere, mood, and overall impression rather than fine details. For highly detailed work, traditional layering methods are more appropriate.
Q: How do I prevent watercolor alla prima paintings from looking unfinished?
A: Focus on strong value contrasts and ensure you have definite light, medium, and dark areas. One-session watercolor painting should have clear focal points and well-defined shapes despite soft edges.
Advanced Watercolor Alla Prima Techniques
Mastering Atmospheric Perspective in Alla Prima
Use the natural properties of wet-into-wet watercolor technique to create depth:
- Distant elements: Very wet, pale, soft-edged
- Middle ground: Medium wetness, moderate values
- Foreground: Controlled dampness, strong values, defined edges
Color Temperature Control
In immediate watercolor painting technique, use warm and cool color relationships to create spatial depth and visual interest without relying on fine details.
Take Your Watercolor Alla Prima Skills Further
Next Steps for Mastering Single-Session Watercolor:
- Practice plein air watercolor alla prima to develop speed and confidence
- Experiment with different subjects - from watercolor alla prima landscapes to simple portraits
- Study master painters who used direct painting techniques
- Join online communities focused on direct watercolor painting methods
- Document your progress with before/after photos
The beauty of watercolor alla prima technique lies in its honesty - what you see is what you get. There's no going back to "fix" things, which forces you to paint with intention and embrace the natural flow of watercolor. This single-session watercolor painting approach will transform how you think about watercolor and help you create more spontaneous, lively artwork.


No comments:
Post a Comment